Heartfelt Homemade
Everyone loves getting a card from someone they love.
But what if the card was homemade?.. now that's even better!
Don't you agree??
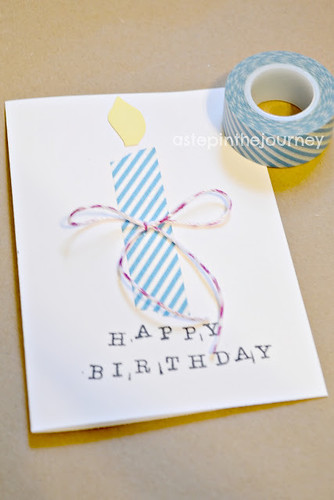
I found this card design off pinterest, and thought it would be perfect to make for Mum for her birthday tomorrow.
This card is very quick & easy to make = perfect for that last minute freak out you have when you realise you forgot to pick a card up on the way home from work.
No worries. I whipped this baby up in just under 10 minutes.
Let's get started!
Materials:
- Cardboard in your choice of colour (I used Kraft brown)
- White paper
- Yellow paper
- Washi tape
- Bakers Twine
- Stamps/Printer
- Craft glue
- Glue Stick
- Glitter (optional)
- Pinking Shears
- Scissors

1. Cut an A4 piece of coloured cardboard in half. Then fold this half in half (ie. the front of your card should be 1/4 of the original size).
2. Stamp your greeting message onto a sheet of white paper, or alternatively type it up on your computer in your favourite font and print. Trace the front of your card onto this sheet of white paper and cut out. Since this is going to lay onto of the other cardboard trim 0.5cm or so off each side.
3. Glue white paper onto front of card using a glue stick.
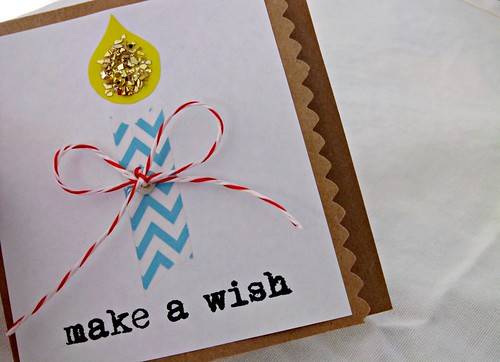
4. Rip a small piece of washi tape off and stick onto card, just above the greeting. This is your candle.
5. Trace a flame design onto your piece of yellow cardboard, cut out, and glue just above your washi tape "candle". If you feel like jazzing your flame up, just dob a bit of glue in the centre, shake on some glitter and voila!

6. Tie a bow in a piece of bakers twine and glue onto your candle.
7. If you want to make an insert in the card to write your message on, simply follow Step 1, trim 0.5cm off each edge and glue inside.
There you go!
A homemade card made quicker than it
would take to pick one out in the store!


I've nominated you for a Liebster Award! http://mummalish.com/2013/08/18/livin-la-vida-liebster/
ReplyDeleteWow! Thankyou thankyou thankyou so much MummaLish! :D
ReplyDeleteAnd thanks so much for reading ittybitty! I feel so special!