Trash to Treasure

DIY: Salvaged Shelves
I love decorating! But when you change your mind as often as I do, you don't want to be spending lots of money to change up the decor of your room. Hello op shops & garbage cleanups! The most exciting thing about scrounging through someone else's junk is that you'll never know what you'll find, and chances are, you'll be pleasantly surprised!
Materials:
- A old drawer/wooden box - I found all mine on the side of the road.
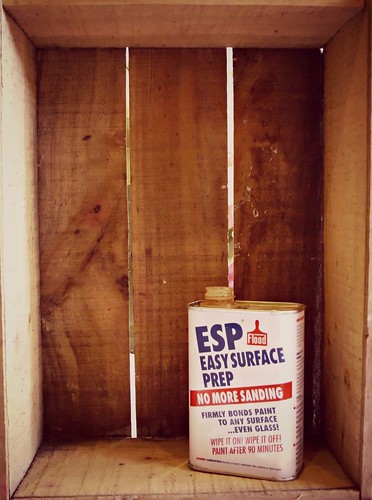
- Easy Surface Prep - to prime the surface and help the paint to stick.
- Disposable gloves.
- A Glass jar.
- A clean rag.
- Paint pot in any shade you desire - 250ml sample pots are perfect!
- Paint brush x 3.
- Scrap booking paper - I chose this to match the shade of my paint.
- Scissors.
- Craft Glue.
- Ribbons/trims to decorate the edges - I chose white ric rac ribbon.
- Hot glue gun.
- A set of 2 picture hooks.
1. Brush down your box to get rid of any unwanted spider webs or dust. Because I was so keen to paint straight away and didn't want to sand, I used ESP to prime my box. Alternatively, sand your box down till it's nice and smooth. When using ESP, simply pour a small amount into a glass jar. Don your groovy disposable gloves and get painting. Cover every surface that you want to paint later on. Leave for 5 mins and wipe off with a clean rag.
2. After your ESP has completely dried (or you have sanded your box), shake your paint pot, grab a clean paint brush and get busy. Paint, paint, paint! Feel free to use a base coat such as white for your first coat if you're painting something that is a little darker, such as a black set of drawers.

3. Once your base coat has gone on, and dried, repeat with a second coat. Continue coating your box with paint until the desired coverage is achieved. My box had 3 coats. Allow a good day or so for your final coat of paint to dry.
4. Trace the base of your wooden box onto your chosen scrap booking paper. Cut template out.
5. Paint a nice thin layer of craft glue on the bottom of your box and place scrap booking piece inside. Use books as weights to flatten the paper in and allow it to stick.
6. If wanted, measure the outside of your box and cut strips of ribbon/trim to size. Glue on using a hot glue gun and allow to dry.
7. When finished, nail two sets of picture hooks to the top corners of your box and hang on wall.
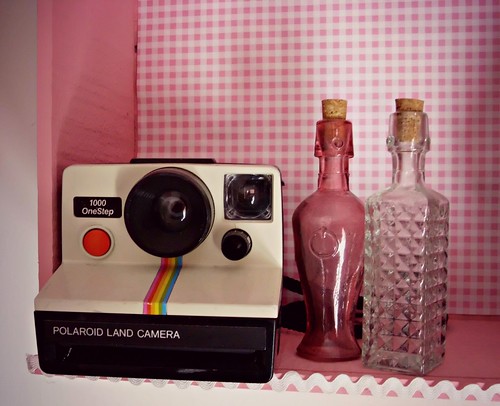
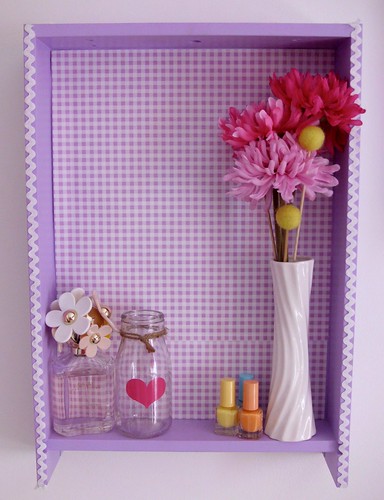
8. Now comes the fun part! Fill your salvaged shelf with anything you want!
............
I enjoyed making these shelves so much that I couldn't stop at just one!

I even found an old dart board cupboard to
reinvent into this knick-knack shelf!

These can be customised to suit any room, mood, or decor.
+ Plus, they can be made for next to nothing!
Who would've thought a dirty, dusty drawer
could be turned into something so snazzy?


No comments:
Post a Comment
Leave me some love ...